In this article I will be sharing how we can simple CRUD app
using Entity Framework Core edition which is basically an open source and
cross-platform version of the Entity Framework to be used in the .Net Core
application development.
With EF Core, data access is performed using a model. A model
is made up of entity classes and a context object (derived from DbContext
class) that represents a session with the database, allowing you to query and save
data in the database.
Here I will be using code first approach without existing database.
Prerequisites
In order
to develop and run .Net Core app, we need .Net Core SDK that includes .Net CLI
tools, .Net Core Runtime.
So download and install the latest
version of .Net Core SDK available from this link.
We will also need code editor, I will
recommend VS Code but if you already have any other code editor that you are
using to write C# code then stick with that otherwise download and install VS
Code from this link.
After installing SDK and VS Code, open
the command prompt and run following command to check if SDK installed
properly.
dotnet --version
You must get the latest version number
as a result. In my case its 3.0.101 since I had installed it sometime back.
After done with the environment setup
we are ready to develop our CRUD console app.
Create a new project
Now go to the folder location where
you want to create app project and open the command window.
Create console type project for our
CRUD app by running following command.
dotnet new console -o EFCore-CrudApp
It will create EFCore-CrudApp folder with the same name project
file in it.
Now we need to work under this folder so move into this
folder.
cd EFCore-CrudApp

Add Package References
First we need to install Entity Framework Core and for that
we need to install the package for the EF Core database provider that we want
to target. In this app we will be using SQL Server so run following command to
install the Entity Framework Core.
dotnet add package Microsoft.EntityFrameworkCore.SqlServer
--version 3.0.0
Note – I have used
specific versions compatible with .net core SDK 3.0 but if you have latest
version then you should run these command without specifying the version.
You find following entry in the app project file after
successful installation.
<PackageReference
Include="Microsoft.EntityFrameworkCore.SqlServer"
Version="3.0.0" />
As we are done with our app project setup, now open VS code
in the project folder to write code for this app.
Create the model
Our model will consists 2 POCO classes and a context class.
Let’s create Model.cs and create following
classes to represent Member and Book entities in our Model.
public class Member
{
public int Id {
get; set; }
public string
Name { get; set; }
public string
PhoneNo { get; set; }
public string
City { get; set; }
}
public class Book
{
public int Id {
get; set; }
public string
Title { get; set; }
public string
Gener { get; set; }
}
Also create CrudAppDbContext class derived from DbContext that
represents session with the database. This class object will be used to perform
crud operations on the database and its properties will represent table in the
database.
public class CrudAppDbContext: DbContext
{
public DbSet Members { get; set; }
public DbSet Books { get; set; }
}
We also need to configure the database connection that will
be used by the EF Migrations to sync that database with the data model in the
application.
So add following code in the CrudAppDbContext class to pass
the database connection while configuring the database context for this app.
protected override
void OnConfiguring(DbContextOptionsBuilder options)
{ options.UseSqlServer(@"Server=localdb)\mssqllocaldb;Database=EFCoreCrudAppDb;Trusted_Connection=True;");
}
Entity
Framework Migrations
Entity Framework provides a way to create a database from the
data model using Migrations. Migrations are used to keen database in sync with
the changes in the application’s data model by updating the database schema
while preserving existing data in the database.
So in order to create migrations we need to install Entity
Framework Core tools that includes “dotnet ef” tool and the EF designer.
Run following command in the command window to install the EF
Core tools.
$ dotnet tool install --global dotnet-ef –version 3.0.0
$ dotnet add package Microsoft.EntityFrameworkCore.Design
–version 3.0.0
Note – I have used specific versions compatible with .net
core SDK 3.0 but if you have latest version then you should run these command
without specifying the version.
<PackageReference Include="Microsoft.EntityFrameworkCore.Design" Version="3.0.0">
<IncludeAssets>runtime; build; native; contentfiles; analyzers; buildtransitive</IncludeAssets>
<PrivateAssets>all</PrivateAssets>
</PackageReference>
Create the
database
Since we have installed Entity Framework Core tools, we are
ready to create database from our application data model.
First, we need to add migrations that will create the
database schema of our model entities.
So run following commands to create the database.
dotnet ef migrations add InitialCreate
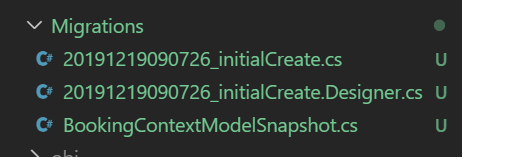
Note – It will add Migrations folder in the project with auto-generated
files for “initialCreate” migration.
Second, we need to apply “initialCreate” migration on the
database. Since it’s a very first migration and we don’t have existing database
so it will create new database for us.
So run following command to apply the migration to the
database.
dotnet ef database update

Note – A new database is created along with the tables for
the model entities.
Add CRUD Operations Code
Since the database is created, we are ready to add code for
crud operations.
Add new file CrudUtility.cs in the project to add crud
operations code.
Add following code to create (insert) data in the Books table
in database.
public static
void AddBook()
{
using (var
dbcontext = new CrudAppDbContext())
{
Console.WriteLine("**********Enter Book details**********");
Console.WriteLine("--------------------------------------");
Console.Write("Book Title : ");
string
title = Console.ReadLine();
Console.Write("Book Gener : ");
string
gener = Console.ReadLine();
Console.WriteLine(" ");
var
book = new Book { Title = title, Gener = gener };
dbcontext.Books.Add(book);
dbcontext.SaveChanges();
}
}
Add following code to read data from the Books table.
public static
void GetBooks()
{
using (var
dbcontext = new CrudAppDbContext())
{
var
query = from b in dbcontext.Books orderby b.Id select b;
Console.WriteLine("**********List of Books**********");
Console.WriteLine("---------------------------------");
foreach
(var b in query)
{
Console.WriteLine("Details of Book No - {0}", b.Id);
Console.WriteLine("--------------------------------- ");
Console.WriteLine("Book Title - {0}", b.Title);
Console.WriteLine("Book Gener -
{0}", b.Gener);
Console.WriteLine(" ");
}
}
}
Add following code to update a particular Book data in the
Books table.
public static
void UpdateBookDetails(int bookId, string title, string gener)
{
using (var
dbcontext = new CrudAppDbContext())
{
var
query = from b in dbcontext.Books orderby b.Id select b;
foreach
(var b in query)
{
if
(b.Id == bookId)
{
b.Title = title;
b.Gener = gener;
dbcontext.Update(b);
break;
}
}
dbcontext.SaveChanges();
}
}
Add following code to delete a particular Book data from the
Books table.
public static
void DeleteBook(int bookId)
{
using (var
dbcontext = new CrudAppDbContext())
{
var
query = from b in dbcontext.Books orderby b.Id select b;
foreach
(var b in query)
{
if
(b.Id == bookId)
{
dbcontext.Remove(b);
break;
}
}
dbcontext.SaveChanges();
}
}
Same way add code to perform CRUD operations on “Member”
entity as well.
Now we have to call these CRUD operations in our app so add
following code in the Main method of Program.cs file.
CrudUtility.AddBook();
CrudUtility.GetBooks();
Console.Write("Enter Book's Id to be deleted : ");
int
deletedBookId = int.Parse(Console.ReadLine());
CrudUtility.DeleteBook(deletedBookId);
Console.Write("Enter Book's Id to be
updated : ");
int
updatedBookId = int.Parse(Console.ReadLine());
Console.Write("Enter Book's Title : ");
string
bookTitle = Console.ReadLine();
Console.Write("Enter Book's Gener : ");
string
bookGener = Console.ReadLine();
CrudUtility.UpdateBookDetails(updatedBookId, bookTitle, bookGener);
You can get the complete source code from my GitHub repository
EFCore-CrudApp with the details about how to setup the code on your machine.
Run the App
At last run the app with following command.
Dotnet run